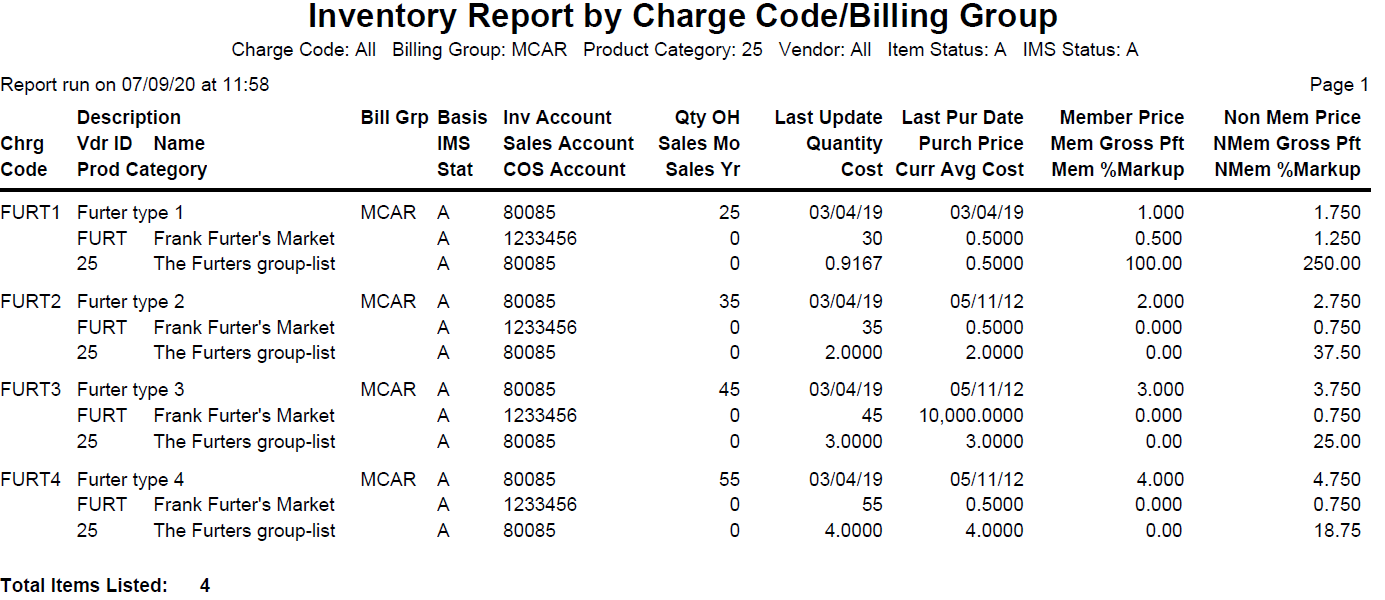
You can make adjustments in your Cloud AMS Inventory module when necessary to keep your inventory records accurate. After performing a physical inventory count, run an Inventory Report to compare your manual count against the inventory values in the system.

NOTE: A few examples in this article are based on the following report results:
If the manual count of your inventory reveals a quantity that does not match the Inventory Report, you need to create an adjustment.
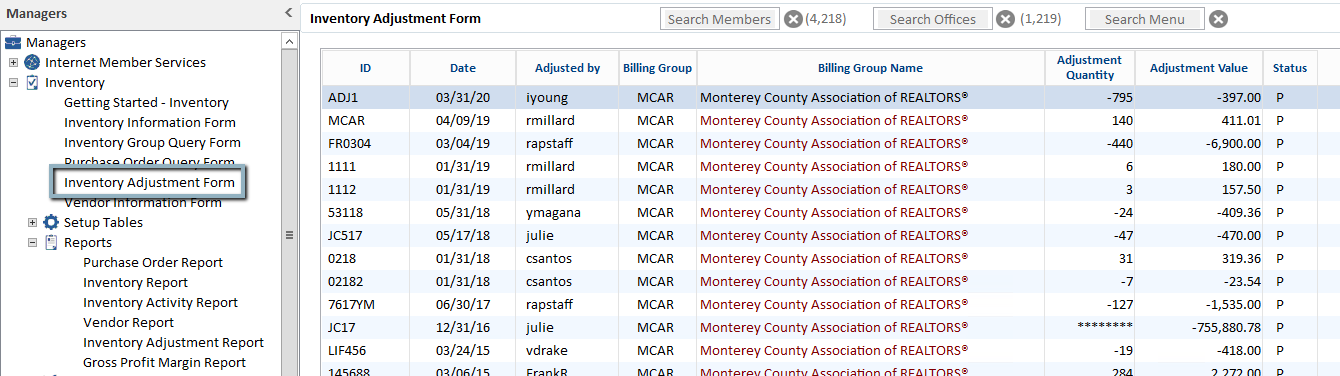
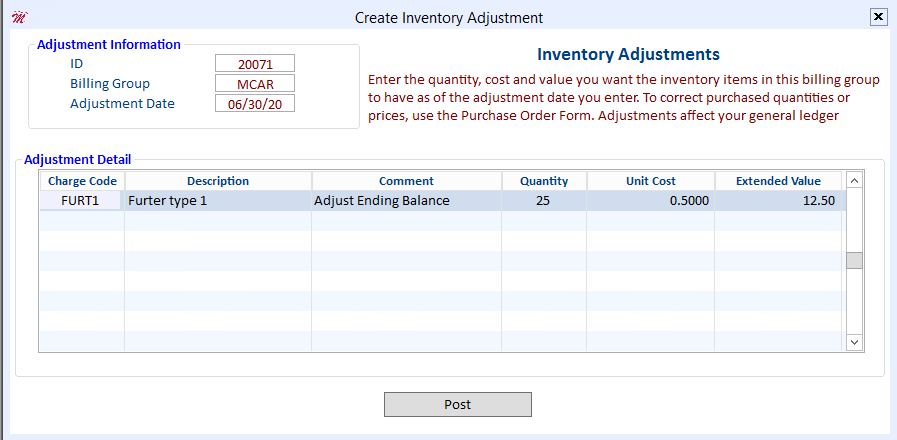
From the Inventory Adjustment Form, press Ctrl+E to open the Create Inventory Adjustment form.
The ID can be set to auto-populate or you can enter your own. Click the Post button once you’re done.
In this article, we will examine three different adjustment scenarios.
Scenario 1: The physical count is less than the quantity reflected in Cloud AMS (for example, you count 10 but Cloud AMS shows 15).
There are two ways you can handle this type of adjustment:
- The association absorbs the loss of the value for the missing merchandise (maintaining the unit cost and reducing the extended value).
- Add the cost of the missing merchandise into the remaining product (raising the unit cost and maintaining the extended value).
To absorb the loss (maintain the unit cost and reduce the extended value):
In the Quantity field, enter the number that you counted during your physical inventory. In the Unit Cost field, enter the average cost from the Inventory Valuation Report that you ran previously.
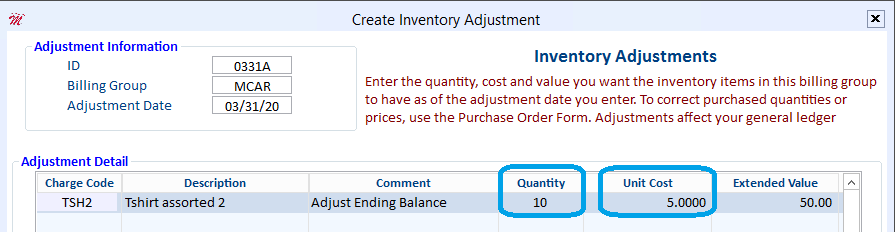
When complete, press Esc and then click the Post button. The system returns to the Inventory Adjustment Form. Zoom to view your posted adjustment. Notice that the quantity has decreased by two and an adjustment value of $-25.00 has been created.

To add the cost into the remaining product (raise the unit cost and maintain the extended value):
In the Quantity field, enter the number that you counted during your physical inventory. In the Extended Value field, enter the extended value from the Inventory Valuation Report that you ran previously.
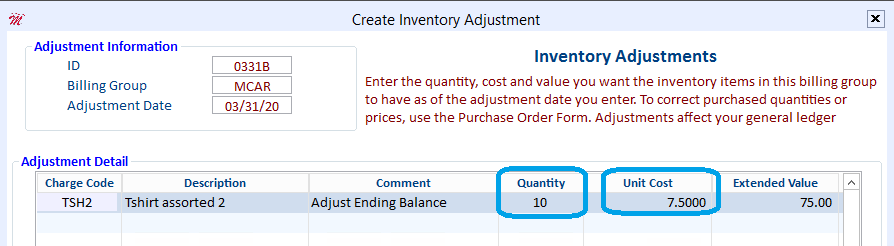
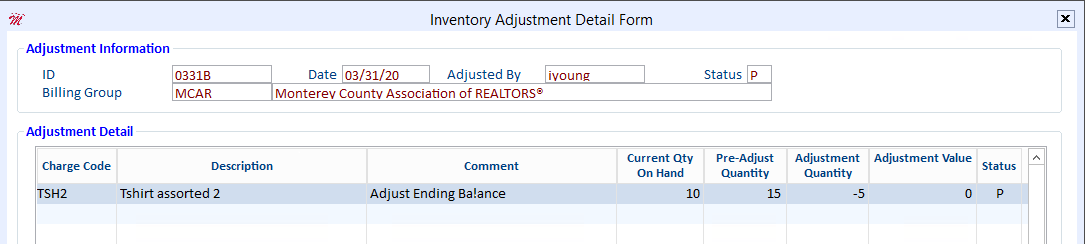
When complete, press Esc and then click the Post button. The system returns to the Inventory Adjustment Form. Zoom to view your posted adjustment. Notice that the quantity has and the adjustment value is $0.00.
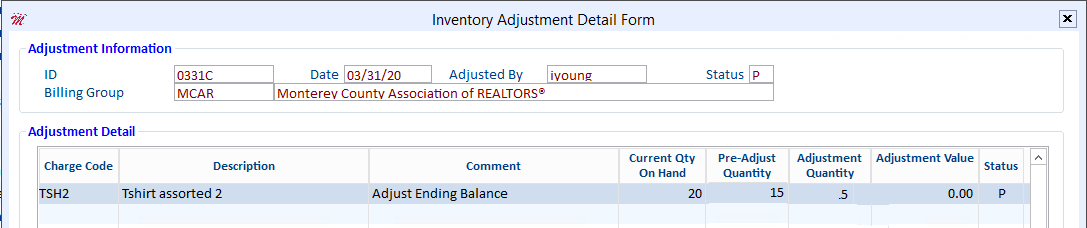
Scenario 2: The physical count is more than the quantity reflected in Cloud AMS (for example, you count 20 but Cloud AMS shows 15).
To add merchandise to the inventory at no cost (reduce the unit cost and maintain the extended value):
In the Quantity field, enter the number that you counted during your physical inventory. In the Extended Value field, enter the extended value from the Inventory Valuation Report that you ran previously.
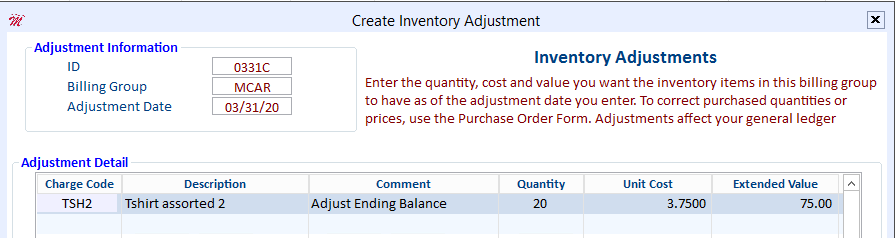
When complete, press Esc and then click the Post button. The system returns to the Inventory Adjustment Form. Zoom to view your posted adjustment. Notice that the quantity has and the adjustment value is $0.00.
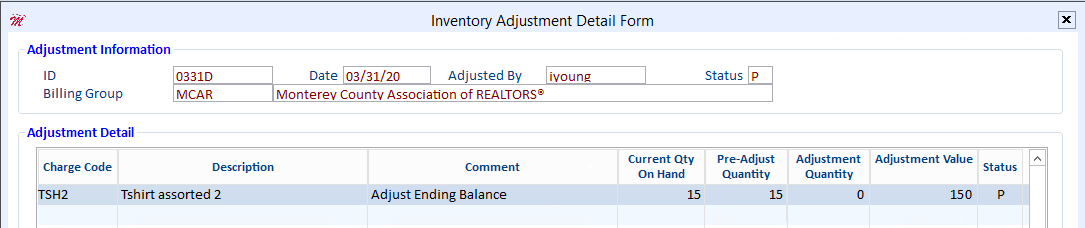
Scenario 3: The physical count matches the quantity reflected in Cloud AMS, but you need to correct the unit cost or extended value (for example, the system shows a unit cost of $5.00 and extended value of $75.00, but these values should be $10.00 and $150.00).
To modify the unit cost and extended value (maintaining the quantity):
In the Quantity field, enter the number that you counted during your physical inventory which also matches your report. Next, enter the desired unit cost or extended value for your adjustment. When you enter either of these values, the other value is automatically calculated.

When complete, press Esc and then click the Post button. The system returns to the Inventory Adjustment Form. Zoom to view your posted adjustment. Notice that the adjustment value is $150.00.