
If your association utilizes Rapattoni's Member Portal and you would like to encourage members to pay their bills online, consider offering them a discount as an incentive.
To set up a discount for Member Portal payments:
After performing your annual dues billing procedures and posting the invoices, you'll need to run another billing to create cash-basis credit invoices.
The first step is to create a charge code for the discount. For example, to provide a $20.00 discount, enter a negative amount for the charge code of -$20.00.
Next, remove all other charge codes from Billing Type Charges for Members, with the exception of your contribution charge codes.
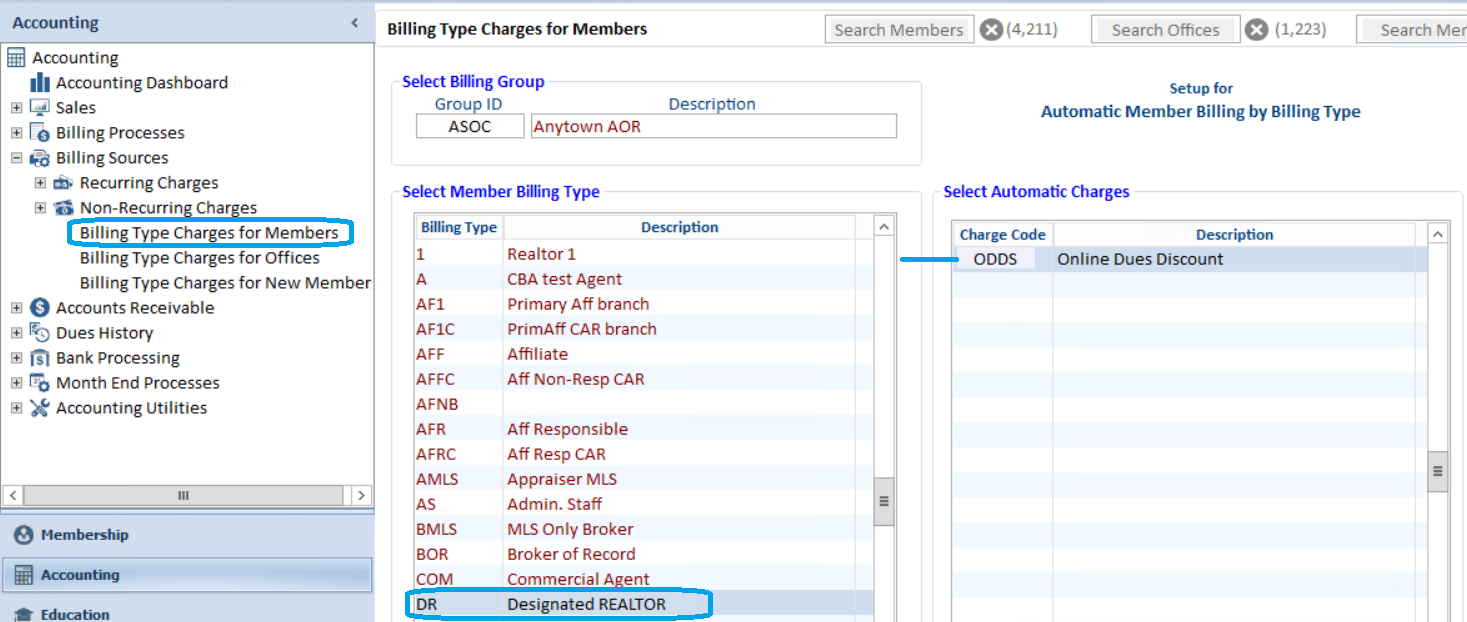
Now, add the discount charge code to all Billing Types that were originally billed for annual dues.
The next step is to run a prebilling, and then run the Create Invoices program to generate the credit invoices. Be sure to make a note of the invoice batch number (the number assigned for all automatically generated invoices)
The credit invoice will be created for all members, and will show in their A/R. Therefore, if a member does NOT pay through the Member Portal (they mail their payment or come into the board office) simply leave the credit invoice alone. The staff that applies these payments should just pay off the dues invoice (and any PAC payments if applicable). NOTE: The unused credit invoices will be deleted later on.
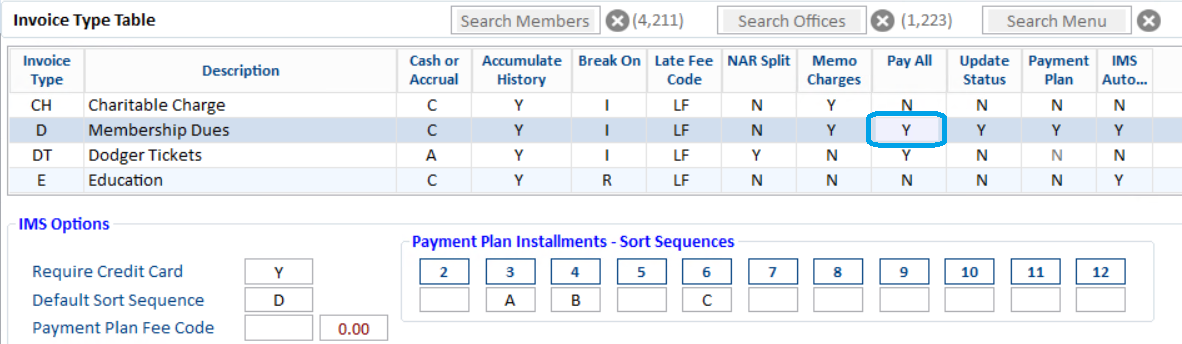
The final step is to make sure that the Pay All flag in the Invoice Type Table is set to Y (yes). This way, when members select their dues invoices to pay in the Member Portal, the credit invoice will also automatically be selected. This will result in the balance due reflecting the discount.
When you are ready to delete the credit invoices that were never applied, run the Delete Unpaid Invoices Utility.
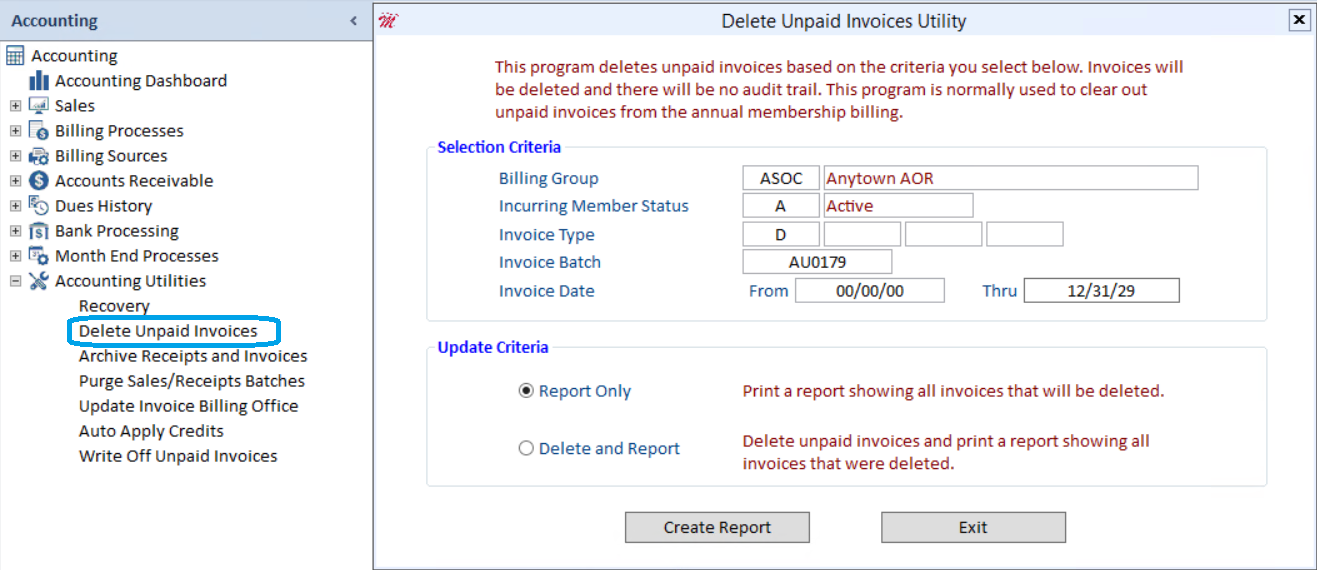
Select the appropriate Billing Group, Incurring Member Status, and Invoice Type. In the Invoice Batch field, enter the batch number that you made note of when you created the credit invoices (you can zoom to select it). You can accept the default values for the Invoice Date fields. It is a good idea to run the Report Only process first, so you can preview the invoices that will be deleted. When you are ready, run the Delete and Report function.
