| Title: | Setup Options for Manual Invoices and Receipts |
| Submitted by: | Rapattoni Software Support |
| Issue: | How can I set up a default message to print at the bottom of manually generated invoices/receipts, and specify which address should print on the invoice/receipt? |
It is often necessary to create a one-time invoice or receipt for items purchased from the Realtor® Store or when processing a new member. These charges are typically handled through the Sales Invoice Form. Several setup options are available for invoices and receipts printed through the Sales Invoice Form.
Follow the steps below to modify the default message, the default member address, or to specify whether the "Billing Group Address" should print at the top of each invoice/receipt.
![]()
![]()
![]()
![]()
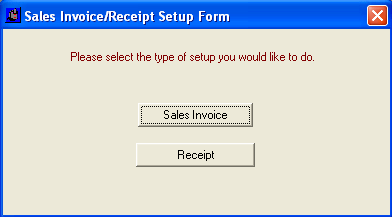
Select the item you want to modify – either Sales Invoice or Receipt.

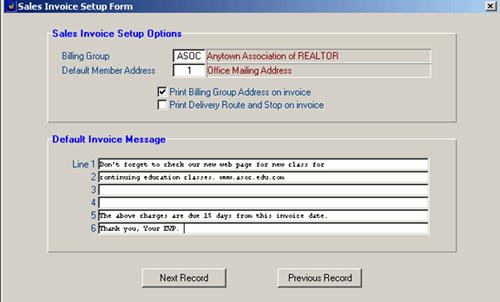
When the Sales Invoice Setup Form displays make sure the Billing Group that you want to modify invoices/receipts for is selected. If not, click the Next Record button at the bottom of the form until the correct Billing Group displays.

Once the correct Billing Group displays, you can make the following changes:
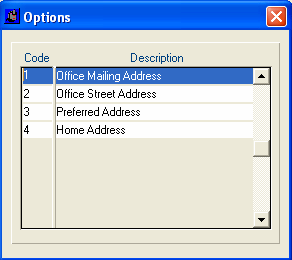
- Default Member Address – Press F5 to zoom and select the type of member address that you want to print on invoices/receipts for this billing group.
- Print Billing Group Address on invoice – Check this box if you want the association address that is specified for this Billing Group to print at the top. Leave it unchecked if your association uses letterhead when printing invoices/receipts.
- Print Delivery Route and Stop on invoice – Check this box if you want delivery route and stop information to print on invoices/receipts for this billing group.
- Default Invoice Message – You can specify up to six lines of text that will print at the bottom of invoices/receipts for this billing group.

When you are done making changes, press the Esc key on your keyboard. Or, to make changes to the invoice/receipt setup for another billing group, use the "Next Record" button until the desired Billing Group displays.

